If you are planning to set up a multiple monitor setup for your workspace, you need to know the right steps in order to make it work correctly. Whether it’s for gaming, your office work, programming, or just regular streaming, there are many perks of a multi-monitor setup. You get a lot more space to work on, which ultimately increases your productivity and enhances your multitasking experience. Also, you get a much wider viewing angle, especially with bezel-less monitors, which will drastically enhance your gaming experience. But you need to know how to setup multiple monitors on windows 10 first.
You have landed in the right place, where we will be showing you all the necessary steps in order to set up a double or triple monitor setup on windows 10. The latest version of Windows, the Windows 10, has several added features over the previous versions which makes setting up multiple monitors very easy without the use of any third party softwares.
Let’s get started with the step by step guide.
How to setup multiple monitors on Windows 10: Step By Step Guide
Step 1: Prerequisites
Before setting up the monitors, here are a few things which you need to get done before getting started:
- Make sure you have the necessary power cables, video signal and the HDMI or Displayport cables required for the computer and each of the monitors.
- Connect all of the monitors using the cables to the PC.
- Make sure that all the connections are made properly and each of then=m is turned on.
Step 2: Get the monitors recognized by the PC
After following all the prerequisites, follow these steps:
- Select start or press the Windows logo on your keyboard.
- Go to System and then open Settings.
- In Settings, find and click on the Display By this time, your computer should automatically detect your monitors.
- The monitors will show your desktop.
- If the monitors are not detected automatically, click on the Detect option in the Display settings.
PRO TIP: For a quick multi monitor setup, press the Windows key and P key together, which will take you to choose a display option.
Step 3: Rearranging the display on multiple monitors
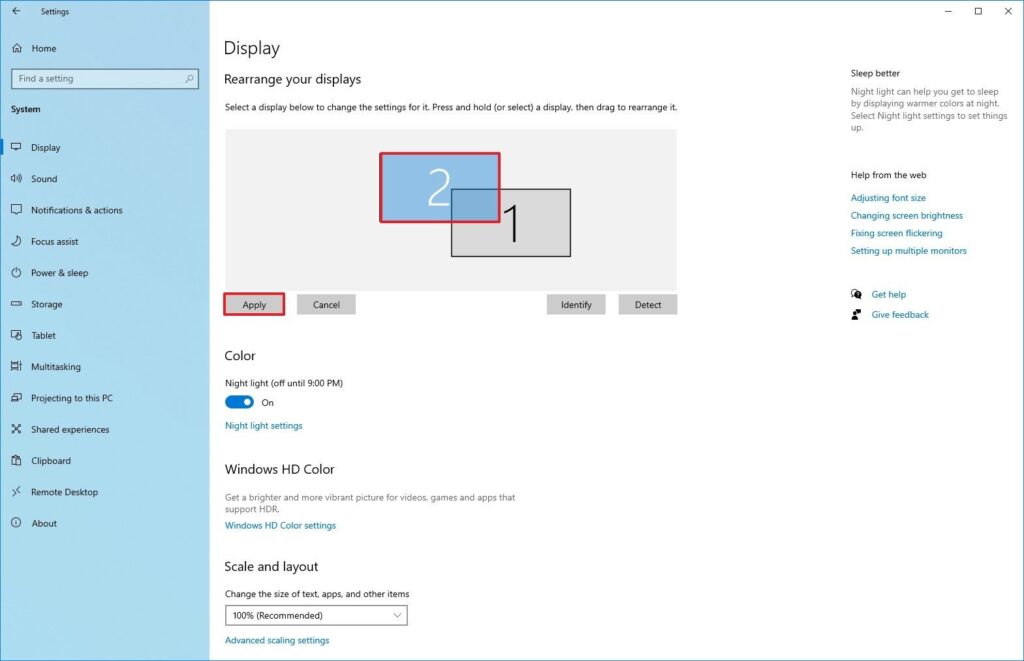
After getting all of your monitors detected, you will need to rearrange the display according to your own needs. In order to do that;
- Open Settings (from the start menu or search bar).
- Go to the Display option again.
- Under the Multiple Displays section, you will get various options to choose from on how your desktop will be displayed on the screens of your multiple monitors.
- You can also customize the rearrangement under the Select and rearrange displays section by dragging and dropping each display according to your own will.
- Apply the changes once everything is finalized.
PRO TIP: While customizing the rearrangement of monitors, make sure to align all the monitors perfectly on the
top, or else you will face problems to move the mouse cursor between two screens.
Conclusion
We hope that this step-by-step guide has helped you on how to setup multiple monitors on Windows 10. You can also check out similar informative guides on our blog.